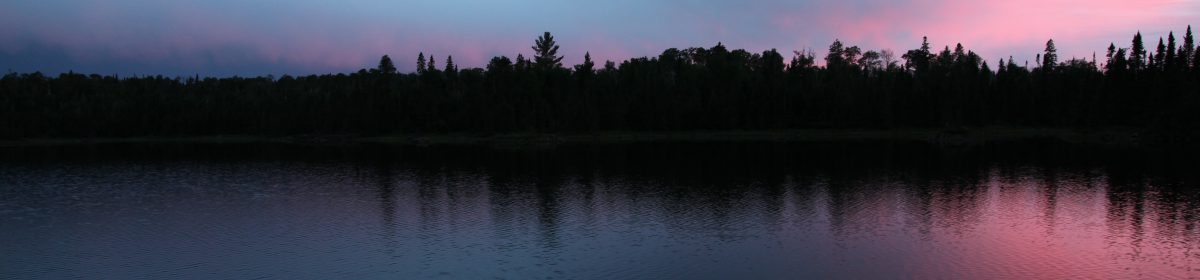
The Drink You Can’t Get Anywhere Else in the World

While relaxing in front of the campfire at the end of a beautiful day, a nice warm drink is the perfect companion as the temperature begins to drop. The Boundary Waters, and any other pristine fresh bodies of water, offer a drink that you are unable to get anywhere else in the world.

IMG_8610

Designate a single water bottle for the trip, or make sure to clean it thoroughly afterwards with boiling water and soap. While out in the middle of the lake, where there is usually less sediment, dip your bottle in and fill it up.

DCIM100GOPRODCIM100GOPRO

Later, when you get to shore and are winding down, pour the water into a pot on your camp stove and bring to a rolling boil. According to the EPA, as long as you are under 5,000 feet in elevation, the water only needs to boil for a full minute to kill any microorganisms; to be on the safe side, I usually boil for about 5 minutes.
https://www.epa.gov/ground-water-and-drinking-water/emergency-disinfection-drinking-water
IMG_6861

Pour your water into a glass, mixing half and half with either whiskey or bourbon and enjoy.

IMG_0998

Due to the variations in mineral content, your exclusive beverage will taste different on every lake you go to; and as every lake is uniquely named, so too is your drink. The drink partly shares the name of lake. For example, if you took pristine spring fed water from Lake Alton it becomes a Whiskey Alton, if from Birch Lake it becomes a Birch Whiskey.

Cheers!

DCIM100GOPRO

DIY Hiking Sticks

I recently made hiking sticks as an incentive for my Scout’s Hiking Club. This project is very economical and turns out looking pretty sharp. What follows is a step by step on how to recreate these hiking sticks.

From the local hardware store I purchased 60” tapered wood handles, as would be used to replace the handle of a broom. These handles are solid, made of oak, prefinished, and cost around $5 each. I then purchased 5/8” rubber chair tips for approximately a quarter each. These tips fit snugly and prevent splintering of the end during use.

Apply a small amount of wood glue inside the tip and attach it to the end of the hiking stick.

20180814_234914 20180814_234945

Wipe off any excess glue and allow to dry.

20180814_235049.jpg 20180814_235113.jpg

When dry, secure stick in a table mounted clamp. Be sure to protect the stick from the clamps grips by using a shop towel or something similar.

20180814_220934

Then holes are drilled down the stick. These holes will allow for a leather wristlet to accurately size for the child and as the child grows. Starting from the foot end, measure 32”, 36”, 40”, 44”, 48”, and 52”.

20180814_220725.jpg

When drilling your wristlet holes, clamping a drill block or jig paired with a level can help give you consistently straight holes.

20180814_220831


20180814_220858.jpg

20180814_220925.jpg

Drill holes with a 5/16” bit. After drilling holes, follow with a countersink bit. The countersink will allow your leather or paracord wristlet to last longer, as well as clean up the appearance if there was any splintering.


20180814_214527b


20180814_214822.jpg

Sand the countersink holes with 300-400 grit sandpaper.


20180814_215028.jpg


After all the wristlet holes have been cleaned up, adding customization is a relatively quick and easy task that will give identification as well as pride to the Scout. You may want to put first name and pack number, or name and date hiking stick earned, or any other combination of your choice.

I use a wood burner with letter/numbered stamps. For consistency, measure 12” down from the top of the stick before starting. A small loop of string or twine makes a good reference line after measuring.

20180815_000449

20180815_000841.jpg


Practice each letter on a scrap piece of wood prior to attempting on the hiking stick.


20180815_184855.jpg

20180817_202036.jpg
After all wood burning personalization is completed, wipe off any remaining dust with a dry rag. Make sure all holes are smooth. Then add a light coat of polyurethane to the entire hiking stick, including holes, and allow to adequately dry. A single coat should work fine, but if there are any bubbles or other imperfections there is nothing wrong with lightly sanding and applying another coat.

20180817_225941.jpg

20180817_232308.jpg

As a final step, tie a small piece of leather cord or paracord through one of the wristlet holes. I used a square knot to allow it to be easily untied to personally adjust for the Scout’s height.

Whether for Scouting or family hikes, these easy DIY hiking sticks are sure to be a hit without breaking the bank.

Thanks!

Easy Trail Ham and Squash Soup

sliced squash
Photo by Pixabay on Pexels.com


This is a hearty soup that is great to prepare and enjoy at home, then dehydrate to be enjoyed again on the trail or around the campfire.  After cooking, place in dehydrator at 155 degrees Fahrenheit until completely dehydrated, then place in vacuum seal bags.  I usually divide the bags into 2 cup (pre-dehydrated) quantities. 


Ingredients

·         64 oz chicken broth

·         *Optional: Ham bone simmered with broth for one hour

·         2 Butternut squash chopped

·         2 medium sized sweet potatoes chopped

·         ½ pound ham  finely chopped

·         1 large onion finely chopped

·         1 stalk celery finely chopped

·         1 large carrot finely chopped

·         2 cloves garlic finely chopped

·         1-2 tbs creole seasoning

·         1 tsp black pepper

·         1 tsp cinnamon 

·         *Optional: 2 jalapeno peppers finely chopped


blur ceramic hob cook cooking

Directions

·         Simmer squash and sweet potatoes in broth until tender

·         Mash until smooth

·         Add the remaining ingredients and slow cook until vegetables are tender


After dehydrating and vacuum sealing, store your trail soup in the freezer until your trip. 


When it comes time to rehydrate, add bag contents to 2 cups of water on camp stove and heat while stirring occasionally until desired consistency is reached.  Be careful not to scorch.

stainless steel pot on brown wood stove outside during night time
Photo by Lum3n.com on Pexels.com


For a fuel conserving variation, add 2 cups of water to the vacuum sealed bag and roll closed.  Gently rock or mix for 20 minutes to bring your soup back to life, then heat on camp stove.


Enjoy!

Why The Million Acre Woods?

I love to unwind in nature, especially the tranquility and varying splendor provided by our great nation’s national parks and forests. One of my favorite destinations is the Boundary Waters Canoe Area Wilderness, which is more than one million acres within the Superior National Forest in northeastern Minnesota. Just as the children’s stories of a much smaller forest acreage, though similarly named, allowed for countless adventures, the Boundary Waters has provided for my own personal adventures.

My journeys have taken me beyond the conifer perfumed air of the Northwoods, to the western landscapes of the desert, to the green rolling hills of the Appalachians, and many other sections of countryside in between.

In these magical places existence seems to have its own tempo and everyday urgencies become blurred. It is during these moments that a true appreciation of creation, identity, and peace of self-reliance can be found.

It is my intent to confer the grace and beauty of these wonderful places, to provide some pointers and tricks,  and make the planning of these personal journeys for others a little less daunting.